
수정 전/ 후 홈 모습

날짜헤더 등록하기
mount가 됨과 동시에 날짜가 표시되어야 하고 월을 이동할 버튼이 필요함
import { useState } from "react";
import MyHeader from './../components/MyHeader'

const Home = () => {

    const [curDate, setCurDate] = useState(new Date());

    const headText = `${curDate.getFullYear()}년 ${curDate.getMonth() + 1}월`

    return (
        <div>
            <MyHeader headText={headText} />
        </div>
    );
};

export default Home;
useState를 통해 날짜를 set해준다.
전에 헤더로 만들어두었던 MyHeader 컴포넌트를 import 해주고
MyHeader컴포넌트 중 headrText안에 headText를 추가해준다.
headText 년 월 설정 시 주의사항
JS에서 월은 0부터 시작되므로 +1을 해줘야한다

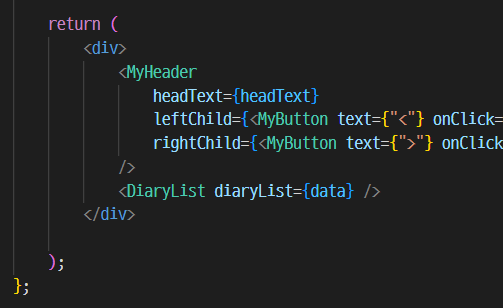
헤더 버튼 구현하기
const Home = () => {
    const [curDate, setCurDate] = useState(new Date());
    const headText = `${curDate.getFullYear()}년 ${curDate.getMonth() + 1}월`
    const increaseMonth = () => {
        setCurDate(new Date(curDate.getFullYear(), curDate.getMonth() + 1, curDate.getDate()));
    }
    const decreaseMonth = () => {
        setCurDate(new Date(curDate.getFullYear(), curDate.getMonth() - 1, curDate.getDate()));
    }

    return (
        <div>
            <MyHeader
                headText={headText}
                leftChild={<MyButton text={"<"} onClick={decreaseMonth} />}
                rightChild={<MyButton text={">"} onClick={increaseMonth} />}
            />
        </div>
    );
};
버튼도 저번에 만들어둔 버튼 컴포넌트를 불러와주었다.
MyHeader 왼쪽 오른쪽에 MyButton컴포넌트를 넣어주고 달이 추가될 때와 이전달로 돌아갈 때 필요한 함수를 작성해 onClick 이벤트로 넣어주었다
DiaryList 만들기
일단 리스트에 출력할 내용이 비어있어서 더미데이타를 넣어주었다
const dummyData = [
  {
    id: 1,
    emotion: 1,
    content: "오늘의 일기 1번",
    date: 1659698205892
  },
  {
    id: 2,
    emotion: 3,
    content: "오늘의 일기 2번",
    date: 1659698205893
  },
  {
    id: 3,
    emotion: 3,
    content: "오늘의 일기 3번",
    date: 1659698205894
  },
  {
    id: 4,
    emotion: 4,
    content: "오늘의 일기 4번",
    date: 1659698205895
  },
  {
    id: 5,
    emotion: 5,
    content: "오늘의 일기 5번",
    date: 1659698205896
  },
]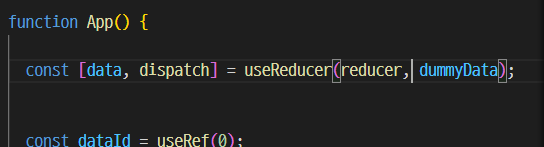
기존에는 [] 빈배열이었던 data의 초기값을 dummyData로 바꿔준다.
const diaryList = useContext(DiaryStateContext);이후 Home 컴포넌트에서 Provider를 통해 해당 더미데이터를 전달받는다
정상적으로 일기 5개를 전달받은 모습을 확인 할 수 있다
이제 날짜에 따라 해당되는 일기만 뜨게 설정해보자
    const [data, setData] = useState([]);

    useEffect(() => {
        if (diaryList.length >= 1) {
            const firstDay = new Date(
                curDate.getFullYear(),
                curDate.getMonth(),
                1
            ).getTime();

            const lastDay = new Date(
                curDate.getFullYear(),
                curDate.getMonth() + 1,
                0
            ).getTime();

            setData(
                diaryList.filter((it) => firstDay <= it.date && it.date <= lastDay)
            );
        }
    }, [diaryList, curDate]);

    useEffect(() => {
        console.log(data);
    }, [data]);
if문으로 diary에 값이 있을때만 data를 이용해 해달 달에 위치한 diaryList만 추려서 출력되게 해주었다
임시데이터가 오늘날짜로 되어있기때문에 8월에 해당할때만 출력된다.
Home안에 들어갈 DiaryList 컴포넌트 생성

props로 diaryList를 받는 DiaryList 컴포넌트를 만들었다.
const DiaryList = ({ diaryList }) => {
    return (
        <div>
            {diaryList.map((it) => (
                <div key={it.id}>{it.content}</div>
            ))}
        </div>
    )
}

DiaryList.defaultProps = {
    diaryList: [],
}

export default DiaryList;
map으로 list랜더링을 해주었다.
그리고다시 Home 컴포넌트로 돌아와 import 후 자식으로 추가해주었다.
List에 정렬기능 추가
const sortOptionList = [
    { value: "latest", name: "최신순" },
    { value: "oldest", name: "오래된 순" },
]

const ControlMenu = ({ value, onChange, optionList }) => {
    return <select value={value} onChange={(e) => onChange(e.target.value)}>
        {optionList.map((it, idx) => (
            <option key={idx} value={it.value}>
                {it.name}
            </option>
        ))}
    </select>
}

const DiaryList = ({ diaryList }) => {

    const [sortType, setSortType] = useState('latest');

    const getProcessedDiaryList = () => {
        const compare = (a, b) => {
            if (sortType === 'latest') {
                return parseInt(b.date) - parseInt(a.date);
            } else {
                return parseInt(a.date) - parseInt(b.date);
            }
        }
        const copyList = JSON.parse(JSON.stringify(diaryList));
        const sortedList = copyList.sort(compare);
        return sortedList;
    };

    return (
        <div>
            <ControlMenu
                value={sortType}
                onChange={setSortType}
                optionList={sortOptionList} />
            {getProcessedDiaryList().map((it) => (
                <div key={it.id}>{it.content}</div>
            ))}
        </div>
    )
}
옵션리스트를 통해 최신순, 오래된순으로 값을 주고 값이 변화할 때 Change이벤트를 optionList에 준다.
최신순 오래된순 정렬은 sort대신 JSON.parse(JSON.stringify()) 를 사용해 깊은 복사를 해줄것이다.
후 DiaryList에 map으로 list랜더링을 해주는게아닌 getProcessedDiaryList를 랜더링을 해주어 최신, 오래된 순으로 상태변화를 할 수 있도록 해주었다.
감정필터링 추가
const [filter, setFilter] = useState("all");DiaryList 컴포넌트안에 filter를 추가해주었다
const filterOptionList = [
    { value: "all", name: "전부 다" },
    { value: "good", name: "좋은 감정만" },
    { value: "bad", name: "안좋은 감정만" },
]
select에 나타날 옵션의 name을 정렬때처럼 따로 만들어주었다
            <ControlMenu
                value={filter}
                onChange={setFilter}
                optionList={filterOptionList} />
DiaryList 컴포넌트 return 안에 정렬 때와 똑같이 필터링 값, 변경값, 변경요소를 적어주었다.
    const getProcessedDiaryList = () => {

        const filterCallback = (item) => {
            if (filter === 'good') {
                return parseInt(item.emotion) <= 3;
            } else {
                return parseInt(item.emotion) > 3;
            }
        }

        const compare = (a, b) => {
            if (sortType === 'latest') {
                return parseInt(b.date) - parseInt(a.date);
            } else {
                return parseInt(a.date) - parseInt(b.date);
            }
        }
        const copyList = JSON.parse(JSON.stringify(diaryList));
        const filteredList = filter === 'all' ? copyList : copyList.filter((it) => filterCallback(it));
        const sortedList = filteredList.sort(compare);
        return sortedList;
    };
랜더링 되는 필터링에 filteredList를 추가해서 감정값에따라 필터링 된 후 정렬되도록 하였다.
새일기쓰기 버튼 생성
react router dom의 navigator를 사용해 새 일기쓰기 버튼을 누르면 /new url로 이동하도록 해주었다.
<MyButton type={'positive'} text={'새 일기쓰기'} onClick={() => navigate("/new")} />
menu css
각 디비전에 className부여 해주고
/* DiaryList */

.DiaryList .menu_wrapper {
  margin: 20px 0 30px 0;
  display: flex;
  justify-content: space-between;
}

.DiaryList .menu_wrapper .right_col {
  flex-grow: 1;
}

.DiaryList .menu_wrapper .right_col button {
  width: 100%;
}

.DiaryList .ControlMenu {
  margin-right: 10px;
  border: none;
  border-radius: 5px;
  background-color: #ececec;
  padding: 10px 20px;
  cursor: pointer;
  font-family: "Nanum Pen Script";
다이어리 아이템 만들기


현재 오늘의 일기가 뿌려지는 부분은 저 부분이다.
            {getProcessedDiaryList().map((it) => (
                <DiaryItem key={it.id} {...it} />
            ))}
랜더링 될 부분을 DiaryItem 컴포넌트로 바꿔준다.
            <div className={[
                "emotion_img_wrapper",
                `emotion_img_wrapper_${emotion}`,
            ].join(" ")}
            >
                <img src={process.env.PUBLIC_URL + `assets/emotion${emotion}.png`} />
            </div>
첫번째 디비전은 이미지가 들어오는 감정표현 emotion부분
/* DiaryItem */
.DiaryItem {
padding: 15px 0;
border-bottom: 1px solid #e2e2e2;
display: flex;
justify-content: space-between;
}
.DiaryItem .emotion_img_wrapper {
cursor: pointer;
min-width: 120px;
height: 80px;
border-radius: 5px;
display: flex;
justify-content: center;
}
.DiaryItem .emotion_img_wrapper_1 {
background-color: #64c964;
}
.DiaryItem .emotion_img_wrapper_2 {
background-color: #9dd772;
}
.DiaryItem .emotion_img_wrapper_3 {
background-color: #fdce17;
}
.DiaryItem .emotion_img_wrapper_4 {
background-color: #fd8446;
}
.DiaryItem .emotion_img_wrapper_5 {
background-color: #fd565f;
}
.DiaryItem .emotion_img_wrapper img {
width: 50%
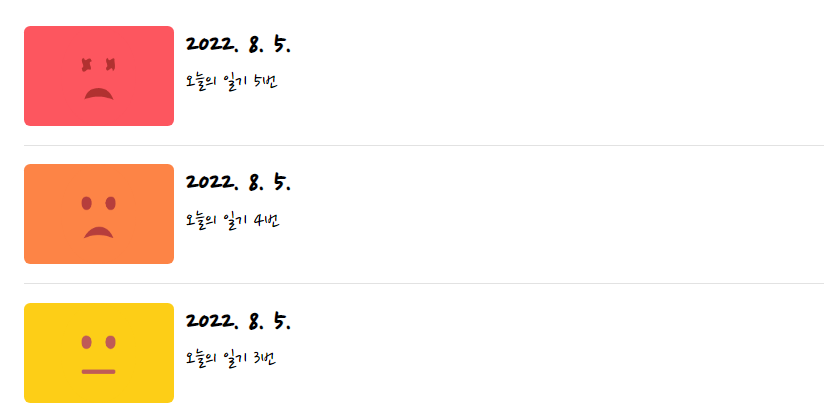
}CSS까지 추가해주면
귀요미 감정표현들이 들어가있다
emotion 점수에 따라 달라지는 이미지!
두번째 디비전은 날짜와 본문미리보기 부분
const strDate = new Date(parseInt(date)).toLocaleDateString(); <div className="info_wrapper">
<div className="diary_date">{strDate}</div>
<div className="diary_content_priview">{content.slice(0, 25)}</div>
</div>날짜는 현재 ms로 나오고 있어서 보기편하게 localeDateString함수를 사용하여 변환해주었다.
.DiaryItem .info_wrapper {
  flex-grow: 1;
  margin-left: 10px;
  cursor: pointer;
}

.DiaryItem .diary_date {
  font-weight: bold;
  font-size: 25px;
  margin-bottom: 5px;
}

.DiaryItem .diary_content_priview {
  font-size: 18px;
}
CSS까지 완료
두번째 디비전은 수정하기 버튼
            <div className="btn_wrapper">
                <MyButton text={"수정하기"} />
            </div>
.DiaryItem .btn_wrapper {
min-width: 70px;
}
마지막! navigator를 사용해서 url 입력하기
import { useNavigate } from "react-router-dom";
import MyButton from "./MyButton";

const DiaryItem = ({ id, emotion, content, date }) => {
    const navigate = useNavigate();
    const strDate = new Date(parseInt(date)).toLocaleDateString();
    const goDetail = () => {
        navigate(`/diary/${id}`);
    }
    return (
        <div className="DiaryItem">
            <div onClick={goDetail} className={[
                "emotion_img_wrapper",
                `emotion_img_wrapper_${emotion}`,
            ].join(" ")}
            >
                <img src={process.env.PUBLIC_URL + `assets/emotion${emotion}.png`} />
            </div>
            <div onClick={goDetail} className="info_wrapper" >
                <div className="diary_date">{strDate}</div>
                <div className="diary_content_priview">{content.slice(0, 25)}</div>
            </div>
            <div className="btn_wrapper">
                <MyButton text={"수정하기"} onClick={() => navigate(`/edit/${id}`)} />
            </div>
        </div>
    )
}

export default DiaryItem;
수정하기 버튼은 MyButton에 onClick 이벤트가 있기때문에 goDetail처럼 함수로 따로 안빼고 그냥 넣어줬다
Home 페이지 완성
참고 :
- 한 입 크기로 잘라먹는 리액트
'개발 > Inafolio' 카테고리의 다른 글
| [React] 미니프로젝트 - 일기장 글 수정 화면 구현하기 (0) | 2022.08.11 |
|---|---|
| [React] 미니프로젝트 - 일기장 글 작성/수정 화면 구현하기 (0) | 2022.08.09 |
| [React] 프로젝트 기초공사하기2 - 상태분리, Provider (0) | 2022.08.03 |
| [React] 프로젝트 기초공사하기 - 공통 컴포넌트, 폰트, 레이아웃 css 셋팅 (0) | 2022.08.02 |
| [혼공단 8기] 4주차 미션 (0) | 2022.07.31 |